
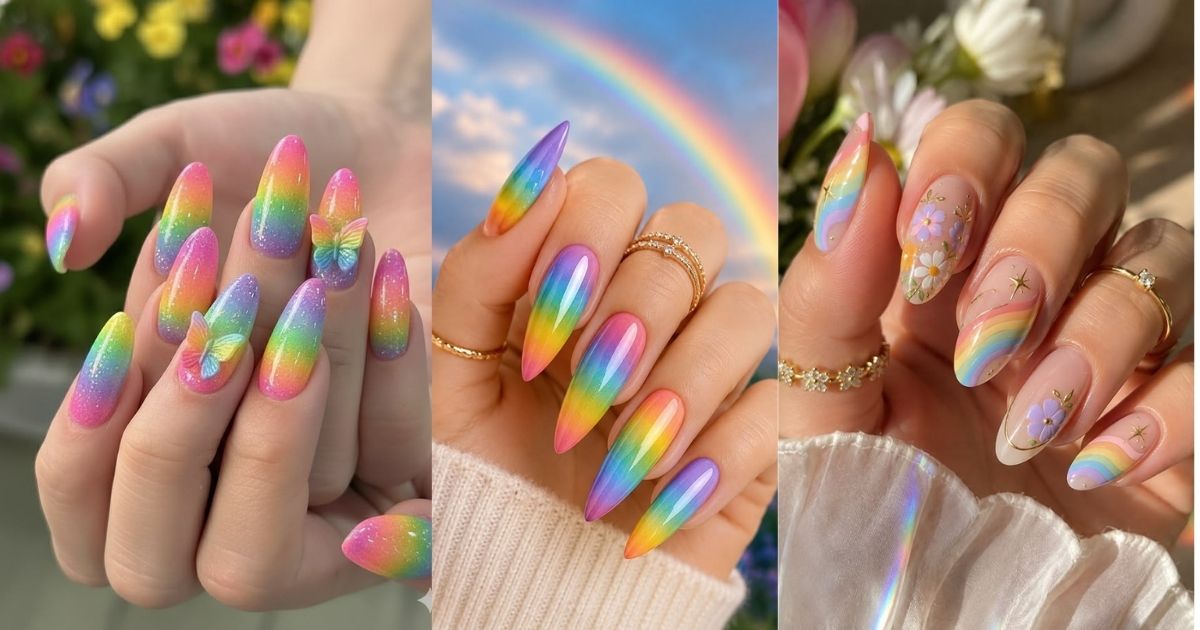

Simple rainbow nails aren’t a phase. They’re one of the few manicure trends that keeps reinventing itself year after year, moving from simple stripes to skittle sets, chrome aura blends, and the fuzzy mohair finishes that took over feeds in 2026.
What hasn’t changed is the challenge: too many colors on ten small canvases can look chaotic fast. The difference between a rainbow manicure that reads as “expensive” and one that reads as “messy” almost always comes down to a handful of decisions, color order, nail shape, technique, and finish.
This guide walks through all of it: the styles worth trying, how to adapt them to your nail length, the tools that actually matter, and the small mistakes that quietly wreck an otherwise great design. Whether you’re painting your own nails at the kitchen table or bringing reference photos to your nail tech, you’ll leave with a plan.
Understanding Nail Art Rainbow Design (Before You Pick a Polish)
A nail art rainbow design isn’t just “several bright colors on the same hand.” It’s color arranged with a logic, usually following the natural order of the visible spectrum (red, orange, yellow, green, blue, indigo, violet), or a curated slice of it.
There are generally two approaches nail artists work from:
- Full-spectrum designs, every hue appears, moving in sequence across the nails or within a single nail.
- Selective or “skittle” designs, three to five shades hint at the rainbow without using the whole range.
Both work. What separates a polished result from a cluttered one is contrast control. Placing a saturated color next to a similarly saturated one can flatten the design, while alternating warm and cool tones, or breaking up bold color with a neutral or white base, gives the eye somewhere to rest.
This is also why undertone matters. Cool-toned blues and violets paired with warm oranges and yellows can clash unless separated by a buffer color, a bit of negative space, or a shimmer finish that softens the transition. Getting this right at the planning stage saves a lot of polish remover later.
Read More: Baby Shower Nails Boy
Popular Nail Art Rainbow Design Styles That Actually Hold Up
Classic Rainbow Stripes
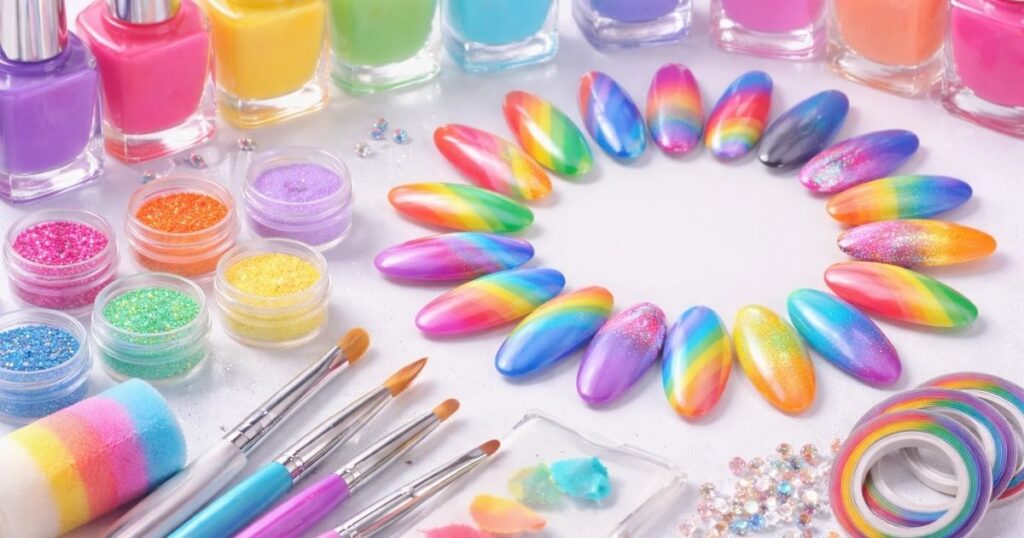
Stripes are usually the first rainbow design people try, and they’re a reliable starting point for a reason, thin, evenly spaced lines are forgiving and instantly recognizable as “rainbow nails” without needing extra detail.
- Vertical stripes tend to make short or wide nails look longer.
- Horizontal stripes read bolder but need a steadier hand to keep spacing even.
- A striping brush or thin nail art tape makes lines far easier to keep straight.
Pastel Rainbow Nail Art
Soft, muted versions of the spectrum, think lavender, mint, buttercream yellow, baby blue, and blush pink, have become one of the most requested rainbow styles for weddings, spring, and office settings.
Why pastels work so well:
- Lower contrast means the design feels calm rather than loud.
- Colors blend into each other more forgivingly, which helps with gradients.
- Small application mistakes are far less noticeable than they would be in neon.
Neon Rainbow Nail Designs
Neon rainbow nails are built for visibility, festivals, concerts, and vacation looks lean on this palette because it photographs well and holds attention under bright light or flash.
To keep neon from looking unfinished:
- Pair it with a dark or nude base coat for contrast.
- Keep extra detailing minimal; the color itself is the statement.
- Finish with a high-gloss top coat, since neon shades lose intensity under matte finishes.
Ombre & Gradient Rainbow Nails
Where stripes feel structured, gradient rainbow nails feel fluid. Colors melt into one another either across a single nail or across the whole set, and the effect looks noticeably more expensive when the transitions are smooth.
Two common blending methods:
| Method | Best For | Difficulty |
| Sponge blending | Soft, cloud-like fades | Beginner-friendly |
| Brush blending | Sharper, controlled fades | Requires more practice |
Rushed gradients are easy to spot, so this is one style where slowing down genuinely improves the outcome.
Abstract & Artistic Rainbow Nails
Swirls, curved color blocks, aura-style blurred edges, and negative space accents fall under this category. It’s the most expressive take on the trend, but “abstract” doesn’t mean unplanned, the best versions still repeat a shape, a spacing pattern, or a neutral base color across the set to keep it from looking random.
Nail Art Rainbow Design by Nail Shape & Length
Short Nails
Short nails have the least surface area, so restraint pays off. Vertical rainbow accents, a single arc near the cuticle, or gradient tips tend to look cleaner than a full multicolor design squeezed onto a small canvas.
Medium-Length Nails
This is generally considered the most versatile length for rainbow nail art. There’s enough room for full spectrum designs, accent nails, or mixed techniques (stripes on some fingers, gradient on others) without overwhelming the shape.
Long Nails
Longer nails, especially coffin, almond, and stiletto shapes, give each nail room to act almost like its own panel, letting a design tell a fuller “story” across the hand. The trade-off is that any unevenness in line work or color placement becomes far more visible, so precision matters more here than on shorter sets.
Nail Art Rainbow Design for Different Occasions
Everyday & Office-Friendly Rainbow Nails
Rainbow nails can absolutely work in professional settings when the execution is toned down:
- Pastel or muted shades instead of neon
- Thin lines rather than large color blocks
- One or two accent nails instead of a full rainbow set
Festivals, Pride & Celebrations
This is where bold, saturated color and asymmetry are welcome rather than reined in. Pride nails, in particular, often draw directly from the Pride flag palette, and matching a chrome finish, glitter accent, or heart detail to an outfit or event theme is common.
Events & Photoshoots
Camera flash and natural light both exaggerate color, so what looks balanced in person can look muddy or unbalanced in photos. For weddings, shoots, or events:
- Test the finished design in natural daylight before the event
- Avoid muddy in-between shades that photograph poorly
- Keep both hands as visually balanced as possible
Techniques Used in Nail Art Rainbow Design
Freehand Painting
Freehand gives the most creative control and produces the most original results, but it takes practice and a steady hand, a good detail or liner brush makes a noticeable difference in line precision.
Stamping & Decals
Stamping plates and pre-made decals trade some originality for speed and symmetry. They’re a solid option when you need consistent results across all ten nails without freehand practice.
Gel vs. Regular Polish
| Feature | Gel Polish | Regular Polish |
| Color payoff | High | Medium |
| Dry/cure time | Fast (cured under lamp) | Slower air-dry |
| Typical wear | 2–3 weeks | 5–7 days |
| Removal | Requires soak-off | Easy with remover |
| Best for | Layered, detailed designs | Quick, low-commitment looks |
For a design with multiple thin layers of color, gel generally holds detail and shine better over time.
Tools & Materials That Make a Difference
You don’t need a huge kit, you need a few reliable pieces:
- Highly pigmented polishes (thin or streaky color makes rainbow blending harder)
- A fine detail/liner brush for stripes and outlines
- A makeup sponge for gradient effects
- A quality base coat and top coat
- Nail art tape or striping tape for crisp lines (optional but helpful)
Skimping on the base or top coat undercuts even well-executed color work, since it affects both shine and wear time.
Step-by-Step: A Simple Nail Art Rainbow Design at Home
- Prep the nails, push back cuticles, shape, and lightly buff the surface.
- Apply a base coat, a white or nude base makes rainbow shades look truer and more vivid.
- Plan your color order before you start painting, so you’re not improvising mid-manicure.
- Apply color in thin layers, building up pigment gradually rather than one thick coat.
- Clean up the edges with a small brush dipped in polish remover for crisp lines.
- Seal with two coats of top coat to lock in color and add shine.
Common Mistakes That Ruin Rainbow Nail Art
- Using too many competing colors without a neutral break
- Ignoring warm/cool undertones when placing shades next to each other
- Skipping nail prep, which shortens wear time
- Overcrowding a small nail with too much detail
- Applying color too thick, which leads to smudging and uneven drying
Nail Art Rainbow Design Trends Worth Watching
Current directions favor intention over sheer volume of color:
- Skittle sets, each nail a different solid shade instead of a blended rainbow
- Aura nails, soft, blurred bursts of color rather than hard-edged shapes
- Chrome and cat-eye finishes, metallic or shifting effects layered over rainbow bases
- Mohair-textured nails, a fuzzy, fiber-like effect applied over multicolor bases
- Earth-toned or muted rainbows, the spectrum reinterpreted in warm, dusty tones
How to Make Rainbow Nail Art Last Longer
- Dehydrate the nail plate before polish to help products adhere
- Cap the free edge (the tip) with every coat, including top coat
- Avoid hot water and heavy hand soaking for the first 24 hours
- Reapply a fresh layer of top coat every few days to refresh shine and seal edges
Making Nail Art Rainbow Design Your Own
The most successful rainbow manicures aren’t necessarily the boldest or most technically complex, they’re the ones that actually fit the person wearing them, their nail length, their lifestyle, and how much time they want to spend on upkeep.
Start with a style that matches your comfort level, adjust the palette to suit the occasion, and don’t be afraid to edit a design down if it starts to feel busy. Rainbow nails are meant to be worn with confidence, not overthought.
Conclusion
Nail art rainbow design has moved well past its “kids’ craft table” reputation. Between pastel gradients for the office, neon sets for festivals, and chrome-finished skittle nails for everyday wear, there’s a version of this trend for nearly every occasion and skill level. The common thread across every style that actually works is intention, thoughtful color order, a technique suited to your nail length, and enough restraint to let the palette shine instead of compete with itself. Pick one style from this guide, start small if you’re new to it, and build from there.
FAQs
What is nail art rainbow design?
Nail art rainbow design uses multiple colors, arranged intentionally, to create balanced manicures inspired by the color spectrum.
Are rainbow nail designs hard to maintain?
Not particularly, with proper prep and a quality top coat, they hold up about as well as any other detailed nail art style.
Can nail art rainbow design look professional?
Yes, especially with pastel or muted tones, thin lines, and one or two accent nails instead of a full multicolor set.
Which nail shape works best for rainbow nail art?
Medium to long nails offer the most room to experiment, though short nails work well with simple vertical or gradient designs.
Is gel polish better for rainbow nail art?
Gel polish typically offers stronger color payoff and longer wear, which helps with layered or detailed designs.
How many colors should I use in a rainbow nail design?
Three to seven shades is usually enough to read as a rainbow without overwhelming the nail.
Do rainbow nails suit all seasons?
Yes, pastels tend to suit spring, brights suit summer, and muted or earth-toned rainbows work well in fall and winter.
Can beginners try nail art rainbow design at home?
Yes, simple stripes, gradients, or single accent nails are all beginner-friendly starting points.
Why do some rainbow nail designs look messy?
It’s usually a combination of poor color order, too much detail crammed onto one nail, or skipped prep work.
How long does nail art rainbow design usually last?
With good prep and gel polish, a rainbow manicure can typically last two to three weeks.

