
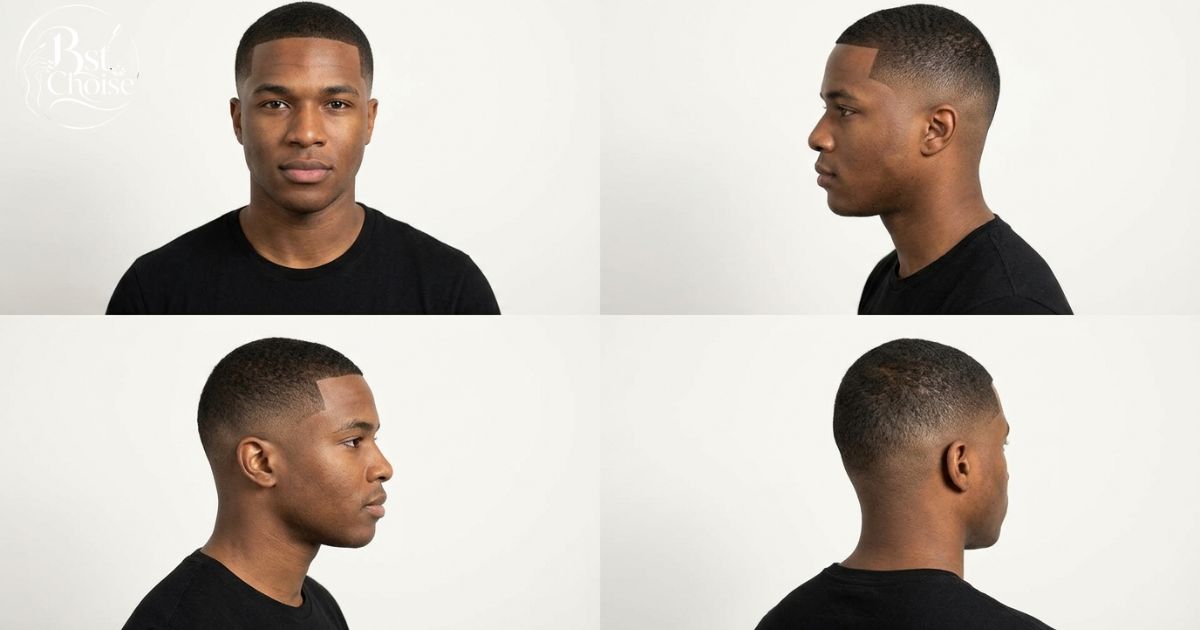

A mid taper fade buzz cut is the sweet spot between a plain all-over buzz and a full barbershop fade. The top stays short, the sides blend down from the temple area to skin, and you walk out looking sharp without any styling routine.
Better still, it’s one of the few fades you can realistically pull off at home. This guide covers five popular variations, a guard number chart, clipper buying tips, a step-by-step DIY method, common mistakes, and a cost comparison so you can decide between your own clippers and a barber’s chair.
What Is a Mid Taper Fade Buzz Cut?
A mid taper fade buzz cut is a short, even-length top paired with sides that fade gradually from around temple height down to skin or near-skin at the sideburns and neckline. The “mid” refers to where the fade starts: halfway between a low fade and a high fade.
The top is clipped with a single guard, so there’s almost nothing to style. All the visual interest comes from the blend.
Quick breakdown:
- Fade start point: roughly level with the temples, near eyebrow height
- Top length: about 3 mm to 13 mm (guards 1 to 4)
- Sides and back: step down through shorter guards until they reach skin
- Styling needed: none, maybe a little moisturizer
Taper vs. Fade: What’s the Difference?
People use the words interchangeably, but they’re not identical. A taper keeps some length and only shortens the hair near the sideburns and neckline. A fade goes shorter, often to bare skin. A mid taper fade sits between the two, which is why it looks clean without looking harsh.
Why Mid Taper Fade Buzz Cut Is So Popular in 2026
There’s no single reason. It’s a mix of practical and visual wins:
- Zero daily effort. No gel, no blow-drying, no bad hair mornings.
- Works on most hair types. Straight, wavy, curly and coily hair all buzz well, and the fade adds shape where a plain buzz can look flat.
- Flattering for many face shapes. The fade starts at mid-height, so it frames the face rather than stretching or shrinking it.
- Easy to hide thinning. Short hair on top makes a receding hairline or thin patches far less obvious than longer styles do.
- Cheap to maintain. One decent clipper set covers months of touch-ups.
- Fits any dress code. It looks tidy at the office, the gym and a wedding.
Social media tutorials have also pushed the DIY side. Short-form videos show that a buzz-length fade is far more forgiving than a long scissor-over-comb fade, so more guys are giving it a go.
5 Mid Taper Fade Buzz Cut Variations
On a buzz cut, the guard length on top is the main thing that changes. Each variation below shifts the contrast between the top and the fade, so pick based on how bold you want the result.
1. Classic Buzz with Mid Taper Fade
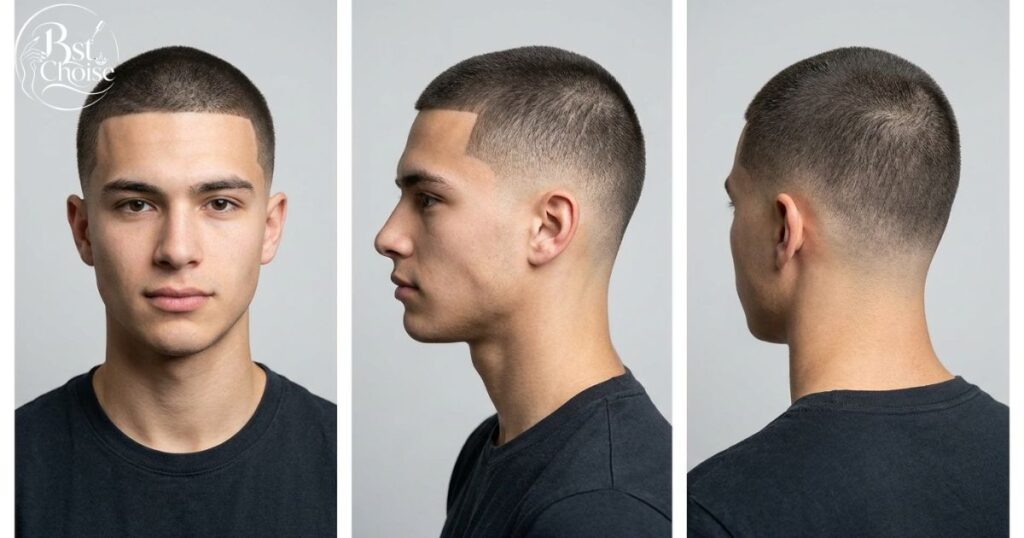
This is the go-to version. A guard 2 or 3 on top sits above a fade that steps down to a 1 and then skin. The contrast is clear but not extreme.
- Top guard: 2 or 3
- Best for: most face shapes and hair types
- Maintenance: every 2 to 3 weeks
Read More: 8 Best Mid Taper Fade Edgar Cut Styles for Men (2026)
2. Burr Cut with Mid Taper Fade
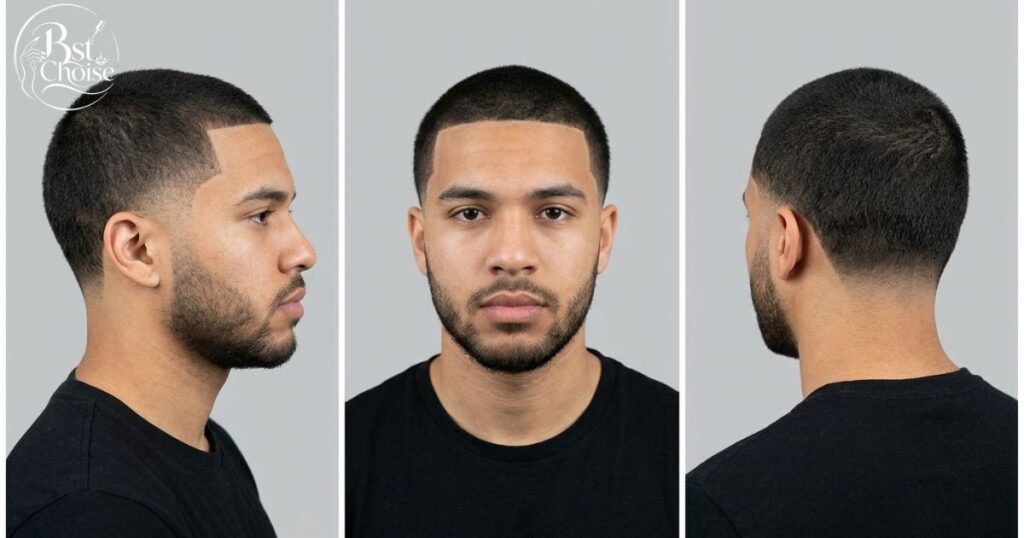
A burr cut goes shorter than a classic buzz, usually a guard 1 or 2. Because the top is so close, the fade blends almost seamlessly into it. The result looks uniform and very neat.
- Top guard: 1 or 2
- Best for: oval and round faces, coily or tightly curled hair
- Maintenance: every 1 to 2 weeks, since regrowth shows fast
3. Textured Buzz with Mid Taper Fade
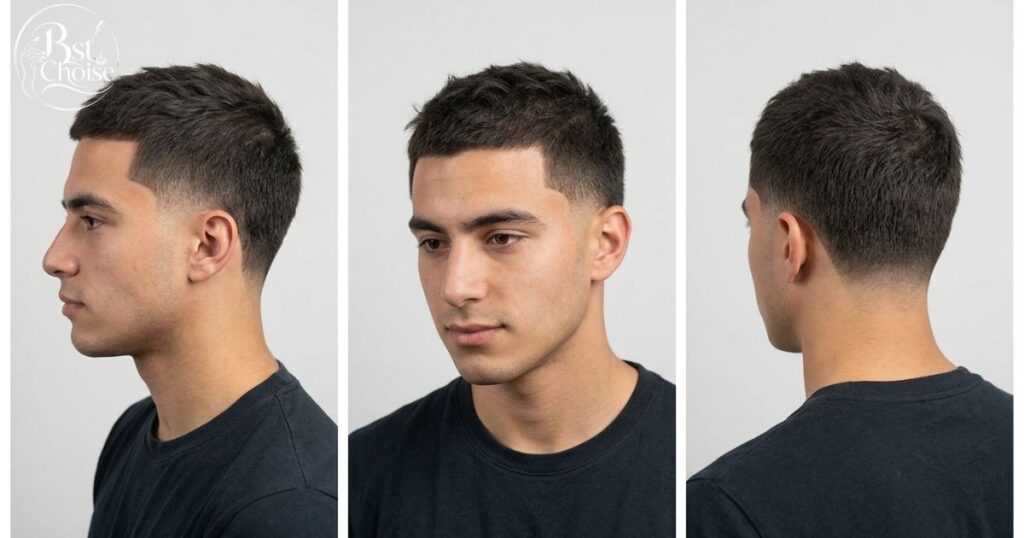
Leave the top a little longer, around a guard 3 or 4, and you’ll see natural texture come through. Waves, curls and cowlicks give the buzz some movement, which softens the overall look.
- Top guard: 3 or 4
- Best for: square or oval faces, thick or coarse hair
- Tip: run the clipper over the top twice, once with the grain and once against it, to keep the length even
4. High-and-Tight with Mid Taper Fade
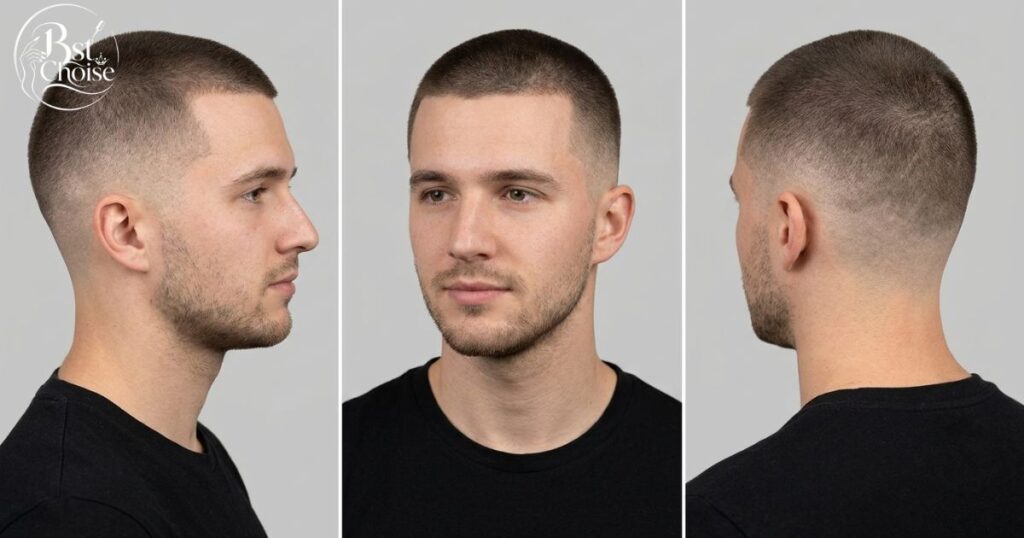
The fade rises a bit higher than a standard mid fade while the top stays tightly clipped. It’s a military-inspired variation with a sharp, structured outline.
- Top guard: 2 to 4
- Best for: oval or longer faces, any hair type
- Note: this one shows every uneven line, so take your time on the blend
5. Skin Buzz with Mid Taper Fade
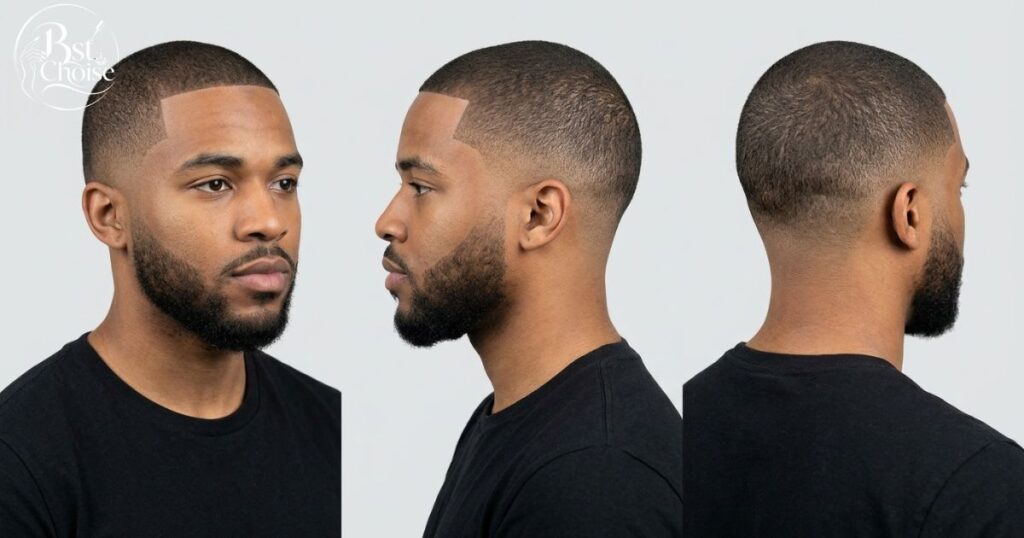
The top is taken down to the shortest setting, either a guard 0.5 or a bare clipper, so there’s almost no contrast with the faded sides. It’s the cleanest and boldest look of the five.
- Top guard: 0.5 or no guard
- Best for: fine or thinning hair, anyone who wants the lowest-maintenance option
- Caution: needs sunscreen on the scalp and a gentle shave routine to avoid razor bumps
Quick Comparison of All Five
| Variation | Top Length | Contrast Level | Best Hair Type |
| Classic Buzz | 6–10 mm (guard 2–3) | Medium | All types |
| Burr Cut | 3–6 mm (guard 1–2) | Low–Medium | Coily, curly |
| Textured Buzz | 10–13 mm (guard 3–4) | Medium | Thick, coarse |
| High-and-Tight | 6–13 mm (guard 2–4) | High | All types |
| Skin Buzz | 0–1.5 mm | Low | Fine, thinning |
Guard Numbers & Clippers for a DIY Buzz Cut
Two things decide how this cut turns out: the guard combination and the quality of your clippers. Get those right and the technique becomes much easier.
Guard Number Chart for the Top
Sizes can vary slightly by brand, but most clipper guards follow the same standard. Check the number printed on the guard, because some sets label them differently.
| Guard Number | Length (inches) | Length (mm) | Typical Use |
| 0.5 | 1/16″ | 1.5 mm | Skin-close fade base |
| 1 | 1/8″ | 3 mm | Burr cut, fade transition |
| 2 | 1/4″ | 6 mm | Classic buzz, fade transition |
| 3 | 3/8″ | 10 mm | Classic or textured buzz |
| 4 | 1/2″ | 13 mm | Textured buzz |
| 5 | 5/8″ | 16 mm | Longer buzz, high-and-tight top |
| 6 | 3/4″ | 19 mm | Crew-cut style top |
| 8 | 1″ | 25 mm | Longest standard guard |
A simple fade formula for a guard 3 top: use a 2 on the upper sides, a 1 around the ears, then bare clippers or a trimmer at the neckline and sideburns.
Choosing Clippers for a Buzz Cut
You don’t need a pro-level set, but a few features are worth paying for.
- Sharp, durable blades. Stainless steel or ceramic blades stay sharp longer and cut cleanly instead of tugging hair.
- A full guard set. Look for guards 0.5 through 8 so you can step down gradually.
- An adjustable lever. A taper lever lets you fine-tune length between guard sizes, which makes the blend smoother.
- Cordless or corded? Cordless clippers are easier to maneuver around the back of the head. Corded models often have more power for thick hair and don’t run out of battery halfway through.
- Comfortable weight. You’ll be holding them above your head, so a lighter body helps.
Most people get good results from a mid-range kit in the $40 to $120 range. Spending more mainly buys better motors, longer battery life and finer adjustment.
Tools That Make the Blend Easier
- Two mirrors. A wall mirror plus a handheld one lets you check the back and sides.
- A fine-tooth comb. Handy for clipper-over-comb blending and lifting stray hair.
- A trimmer or edger. This cleans up the neckline, sideburns and around the ears.
- Clipper oil. A drop on the blades before each cut keeps them running smoothly.
- A neck strip and towel. Short hair gets everywhere, so these save on cleanup.
- A good light. Shadows hide uneven patches, so cut near a bright window or lamp.
How to Do a Mid Taper Fade Buzz Cut at Home
The whole method comes down to working in zones and stepping down one guard at a time. Never jump from a 3 straight to a 0, because that’s what creates a visible line instead of a blend.
Step-by-Step DIY Process
This example uses a classic guard 3 on top. Adjust the numbers up or down for other variations.
- Prep your hair. Start with clean, fully dry hair. Wet hair clumps and makes the length look shorter than it is. Oil the blades and set up both mirrors.
- Buzz the top. Attach the guard 3 and run the clippers from front to back, moving against the direction of growth. Overlap each pass slightly. Go over it again from a different angle to catch missed spots.
- Mark your fade line. Decide where the fade will start, about level with the temples. Using the guard 3, run a straight line around the head at that height so both sides match.
- Cut the upper sides. Switch to a guard 2. Starting just below the line, work upward in short strokes and flick the clipper away from the head at the end of each stroke. That flicking motion is what softens the edge.
- Cut the middle section. Drop to a guard 1 and work around the ears and lower sides, stopping a little below your previous section so the layers overlap.
- Take the lower sides and neckline down. Remove the guard, or use a 0.5, and clean the area around the ears, sideburns and nape. Keep the strokes light and blend upward into the guard 1.
- Blend the transition zones. Use the clipper-over-comb technique on any visible lines. Hold the comb flat against the head and clip the hair that sticks through the teeth.
- Clean up the edges. Use a trimmer to neaten the hairline, around the ears and the neck.
- Check from every angle. Use both mirrors in good light. Fix any rough patches with light passes, then brush off the loose hair and rinse your head.
Time to allow: 20 to 40 minutes your first time, and around 15 to 20 minutes once you’ve done it a few times.
Common DIY Mistakes to Avoid
- Skipping guard sizes. Jumping straight from a 3 to a 0 leaves a hard line. Go down one step at a time.
- Pressing too hard. Heavy pressure digs in and creates dips. Let the clipper glide.
- Forgetting to flick out. Without the outward flick at the end of each stroke, the blend looks stripy.
- Rushing the back. The back is hardest to see, so go slowly and check often with the second mirror.
- Uneven fade lines. Measure with your fingers on both sides. One side higher than the other is very noticeable.
- Cutting with dull or dirty blades. Clogged blades snag hair. Clean and oil them first.
- Starting with the shortest guard. You can always go shorter, but you can’t put hair back. Start longer and work down.
- Ignoring the neckline. Decide on a shape first, either a natural taper or a squared edge, and stick with it.
When to See a Professional Instead
DIY works well for routine upkeep, but a barber is the better call in a few situations:
- It’s your first time and you want to see what the fade should look like before copying it.
- You want a crisp line-up, hard part or shaved design.
- You have an important event coming up, like a wedding or interview.
- You have a scalp condition, scars or cowlicks that make blending tricky.
- You tried it yourself and want the mistakes fixed. Most barbers can rescue an uneven fade by going slightly shorter.
A popular compromise is to book a barber once every month or two for the sharp edges and handle the in-between touch-ups yourself.
Professional Barber vs DIY — Cost & Time Comparison
Cost depends on your city, but this table gives a realistic idea of how the two options compare.
| Factor | Barber Visit | DIY at Home |
| Cost per cut | 20–40 plus tip | Close to $0 after setup |
| Upfront cost | None | 40–120 for clippers and guards |
| Time per cut | 20–40 minutes plus travel and waiting | 15–30 minutes |
| Line-up precision | Sharper and more consistent | Improves with practice |
| Convenience | Appointments needed | Whenever you want |
| Estimated yearly cost (cut every 2–3 weeks) | 450–900 | 40–120 (one-time) plus supplies |
| Best for | Sharp edges, events, first-timers | Regular maintenance and touch-ups |
Is It Worth Cutting a Buzz Cut Yourself?
For most people, yes. A buzz cut is the most forgiving cut to do at home, and a mid-range clipper set can pay for itself after three or four skipped barber visits. If you want the best of both worlds, cut it yourself most of the time and let a barber tidy the edges every few weeks.
Mid Taper Fade Buzz Cut — Video Guide
Seeing the guard-stepping technique in motion helps more than reading about it. When you pick a tutorial, look for one that shows the clipper flick, the order of guards, and how the creator checks the back of the head. The best videos also show the finished result from several angles.
What to watch for in a good tutorial:
- The barber or creator names each guard as they switch
- The fade line is marked first, not eyeballed
- Blending is shown up close, not skipped
- The final cut is checked from the side and back
Frequently Asked Questions
What is a mid taper fade buzz cut?
It’s a short, even buzz on top with sides that fade from temple height down to skin. The blend starts halfway up the head, so it sits between a low and a high fade.
What fade looks best with a buzz cut?
A mid fade suits most people because it adds contrast without looking extreme. Low fades are subtler and high fades are bolder, so choose based on your face shape and personal taste.
Can you get a mid fade with a buzz cut?
Yes. In fact, short hair on top makes a mid fade easier to see and easier to blend. It’s one of the most requested buzz cut pairings.
Is a taper or a fade better for a buzz cut?
A fade gives a sharper, cleaner finish by blending to skin. A taper keeps more length on the sides and looks softer, so pick the one that matches the look you want.
What guard number is best for a buzz cut?
A guard 2 or 3 is the most common choice for a classic buzz. A guard 1 gives a closer burr cut, and a 4 leaves a bit more texture.
How do you ask a barber for a mid taper fade buzz cut?
Say “mid taper fade, skin at the bottom, with a guard 2 (or 3) on top.” Bring a photo, because “mid” can mean slightly different heights to different barbers.
How often should you touch up a mid taper fade buzz cut?
Every one to two weeks keeps the fade sharp. If you don’t mind a softer look, every three weeks is fine.
Can you do a mid taper fade buzz cut yourself?
Yes, with good clippers, a full guard set and two mirrors. Go slowly, step down one guard at a time and check the back often.
How long does a mid taper fade buzz cut last?
The fade starts to look soft after about two weeks as the sides grow in. Skin fades lose their sharpness faster than guard-based ones.
Does a mid taper fade buzz cut work for thinning hair?
Yes. Short hair makes thinning less noticeable, and a skin buzz with a mid taper is often the cleanest option for a receding hairline.
What is the difference between a mid fade and a mid taper fade?
A mid fade usually drops closer to skin and looks more dramatic. A mid taper fade is a bit softer and keeps slightly more length around the edges.
Final Thoughts
A mid taper fade buzz cut gives you a sharp, clean look with almost no daily work. Choose the variation that matches your hair and face shape, match your guard numbers to the chart above, and invest in a decent clipper set.
Start longer than you think you need, step down one guard at a time and take your time on the back. If something goes wrong, a barber can usually correct it in minutes. Once you’ve done it a few times, you’ll save money and have your own go-to cut ready whenever the regrowth starts to show.

